
DIY Photo Booth Setup: Create Memorable Moments at Home Parties
Estimated reading time: 7 minutes
Key Takeaways
- Engagement: A DIY photo booth encourages guests to interact creatively, capturing unique moments.
- Cost-effectiveness: Building your own booth can save significantly compared to renting professional setups.
- Memory-making: Personalized photos serve as lasting keepsakes for both hosts and guests.
- Customization: Tailor the booth to match your party theme for a cohesive and enjoyable experience.
- Flexibility: Easily adapt and modify the setup to fit different venues and party sizes.
Table of contents
- What is a DIY Photo Booth?
- How to Make a Photo Booth at Home
- Best Equipment for a DIY Photo Booth
- Homemade Photo Booth Backdrop Ideas
- Budget-Friendly DIY Photo Booth Tips
- Additional Tips for a Successful DIY Photo Booth
- Conclusion
- Frequently Asked Questions

What is a DIY Photo Booth?
A DIY photo booth is a self-made setup that allows guests to take their own photos in a designated area. Unlike traditional photo booths that require renting expensive equipment, a homemade photo booth is cost-effective and easy to create. It enhances home parties by making the experience personalized and interactive, giving guests the freedom to snap pictures at their leisure.
Benefits of a DIY Photo Booth
- Engagement: Guests can get involved and creative, capturing moments in their own unique way.
- Cost-effectiveness: Making your own booth can be significantly cheaper than renting professional services.
- Memory-making: The photos taken are great keepsakes that guests can cherish for years.
With this guide, you will learn how to make a photo booth at home that is both fun and engaging!
How to Make a Photo Booth at Home
Creating your own photo booth at home may sound daunting, but with a bit of planning, it can be simple and enjoyable. Here’s how to do it!
Essential Components
- Space: Begin by picking a well-lit area that has enough room for guests to pose and move about. A spot with natural light will help create better photos.
- Backdrop: Your backdrop can be as simple or intricate as you like. You can use fabric, streamers, or even decorations that fit your party theme. A visually appealing backdrop will enhance photo quality and make your booth inviting.
- Camera: Consider using a high-quality camera such as a DSLR, a mirrorless camera, or even your smartphone if it has a good camera. Your choice of camera will affect the final photo quality.
- Lighting: Good lighting is crucial for great-looking photos. Use LED panels or softbox lights to ensure that your space is well illuminated, preventing unflattering shadows.
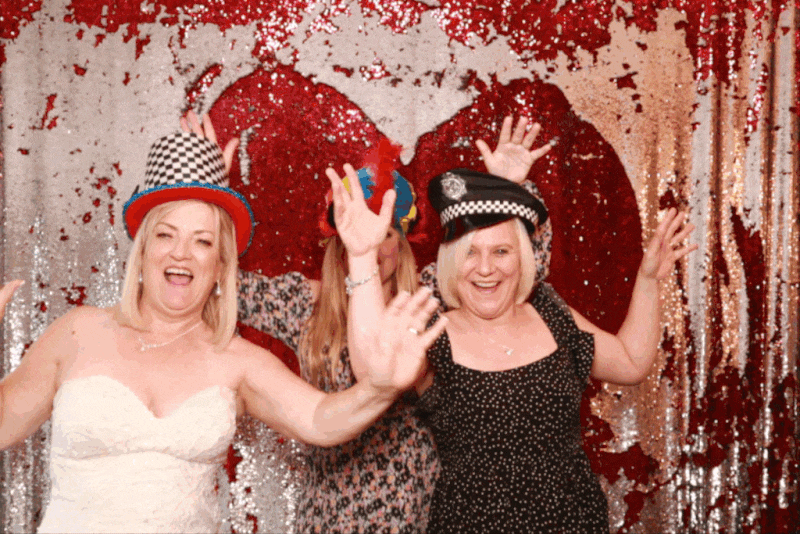
- Props: Fun and quirky props can make your photos more entertaining. Hats, glasses, and signs are all great options that guests will love to use while posing. Props add an extra layer of fun to the experience.
Step-by-Step Setup
- Backdrop: Set up your chosen backdrop in the selected area. Ensure it’s securely attached and stands out visually.
- Camera Positioning: Place your camera or smartphone on a sturdy tripod facing the backdrop. This will stabilize the camera for crisp photos.
- Lighting Arrangement: Position your lighting in a way that covers the space evenly, ensuring everyone in the photo looks good.
- Props Table: Set up a nearby table filled with props for guests to grab and use in their photos, enhancing the fun element.
- Optional Software: If you’re using a computer or tablet, consider installing photo booth software that lets guests take photos with fun filters or borders. Photo booth software can add a professional touch.
Best Equipment for a DIY Photo Booth
Using the right equipment can significantly enhance the quality of your DIY photo booth. Here’s a shortlist of the best equipment for a DIY photo booth:
- High-Quality Camera: A DSLR or mirrorless camera is recommended for capturing high-quality images. If you don’t have one, a good smartphone camera can suffice.
- Sturdy Tripod: A tripod is essential to stabilize the camera, ensuring that each photo is clear and focused.
- Lighting Options: LED panels or softbox lights are preferred for even illumination, providing the best lighting conditions for photography.
- Computer or Tablet: Setting up software on a device can streamline the photo-taking process. Some programs even allow for immediate printing.
- Printer (Optional): If you want to give guests instant mementos from your DIY photo booth, consider having a printer available for on-the-spot photo prints.
Budget-Friendly Alternatives
- Smartphones: Can capture excellent photos if you don’t have a DSLR.
- DIY Props: Use cardboard and craft supplies to create fun, original props.
- Natural Lighting: Take advantage of daylight to cut back on expensive lighting equipment.
- Free Photo Booth Apps: Instead of purchasing software, explore free alternatives available for download. Free photo booth apps can be a great resource.
Homemade Photo Booth Backdrop Ideas
A good backdrop can dramatically enhance your photo booth setup. Here are some creative homemade photo booth backdrop ideas:
- Fabric Backdrop: Hang a large piece of fabric or a shower curtain. Choose colors that complement your party theme for a polished look.
- Colorful Paper Wall: Craft a vibrant wall using crepe paper or streamers. It’s a fun and easy way to create a lively backdrop.
- Balloon Wall: Assemble balloons in various sizes and colors for an exciting festive atmosphere. You can arrange them in different shapes or patterns.
- Floral Backdrop: Design a romantic backdrop using artificial flowers. This adds a charming touch that’s perfect for weddings or garden parties.
Step-by-Step Instructions for a Fabric Backdrop
- Gather materials like a large fabric piece and string or tape.
- Hang the fabric across a wall using adhesive or hooks, ensuring it’s smooth and wrinkle-free.
- Optionally, add decorations like fairy lights or garlands to jazz it up!
Customizing Your Backdrop
To make your backdrop unique, align the design with your party theme. If it’s a birthday party, add your favorite colors or characters. For weddings, floral designs can create a romantic vibe. Customizing your backdrop ensures it complements the overall aesthetic of your event.
Budget-Friendly DIY Photo Booth Tips
- Use Your Smartphone: Instead of investing in a high-end camera, use a smartphone that has a decent camera. Today’s smartphones can capture impressively good photos!
- DIY Props: Tap into your creativity and make props out of everyday materials like cardboard or paper. Fun signs or funny glasses can easily be created at home.
- Utilize Natural Light: Choose a location with plenty of natural light to minimize the need for additional lighting, keeping costs down.
- Explore Free Apps: There are countless free photo booth apps that can provide filters or effects for your photos, reducing the need for paid software. Free photo booth apps are a great way to enhance your photos without increasing your budget.
Additional Tips for a Successful DIY Photo Booth
- Test Your Setup: Make sure to conduct a test run of your photo booth before the event. This will help identify any potential issues, ensuring everything runs smoothly.
- Usage Instructions: Create clear, simple usage instructions for guests. This could be a small sign with fun graphics explaining how to use the booth.
- Appoint an Attendant: Designate someone to help guests with the setup and take care of any issues. This assistant can make the experience even smoother!
- Digital Sharing Options: Offer ways for your guests to easily share their photos, such as email or social media uploads. This will make it easier for them to take memories home. Digital sharing options enhance the accessibility of the photos.
Conclusion
Creating a DIY photo booth setup is a creative and enjoyable way to elevate your home parties. It inspires laughter and joy while producing tangible memories that your guests can cherish. By following this guide, you’re well on your way to crafting an engaging and fun experience!
Don’t hesitate to unleash your creativity and share your DIY photo booth moments in the comments below! Your unique ideas might inspire others in our community to host unforgettable gatherings centered around joy and memory-making. Happy photo booth creating!
Frequently Asked Questions
1. What equipment do I need to set up a DIY photo booth?
To set up a DIY photo booth, you’ll need a camera (DSLR or smartphone), a sturdy tripod, good lighting (LED panels or softbox lights), a backdrop, and fun props for your guests.
2. How can I make my photo booth setup budget-friendly?
You can make your photo booth budget-friendly by using a smartphone instead of a DSLR, creating DIY props from household items, utilizing natural lighting, and exploring free photo booth apps.
3. What are some creative backdrop ideas for a DIY photo booth?
Creative backdrop ideas include using fabric or shower curtains, crafting a colorful paper wall with crepe paper or streamers, assembling a balloon wall, or designing a floral backdrop with artificial flowers.
4. Do I need special software for my photo booth?
While not necessary, photo booth software can enhance the experience by allowing guests to add filters or borders to their photos. There are also free apps available that provide similar functionalities.
5. How do I ensure my photo booth runs smoothly during the party?
To ensure your photo booth runs smoothly, conduct a test run before the event, provide clear usage instructions for guests, appoint an attendant to assist, and offer digital sharing options for easy access to photos.